
Discover the process of layering drinks to create eye-catching cocktails. Impress your friends with this fun, creative technique!
Welcome to Shake, Sip, Serve, your one-stop shop for all things bartending.
I’m your host, KAD, and I’ve been slinging drinks and navigating the world of hospitality for over two decades.
The past 15 years, I’ve perfected my bartending skills, experimented with countless flavor combinations, and learning a thing or two about how to keep the party going behind the bar.
Whether you’re a seasoned bartender like me just looking for some fresh inspiration or a complete beginner who is eager to whip up impressive cocktails at home, Shake, Sip, Serve is here to be your guide.
In the below blog, I’ll be sharing my knowledge and experience on everything from classic cocktails and innovative new creations to essential bartending techniques and industry secrets. I’ll also be offering tips on stocking your home bar, mastering the art of presentation, and creating a memorable experience for your guests.
So, grab your shaker, dust off your favorite glassware, and get ready to embark on a delicious journey into the world of bartending!
Let’s Shake, Sip, and Serve up something amazing together.
Disclaimer: This post contains affiliate links. If you purchase through these links, I may earn a small commission at no additional cost to you.
Want to impress with some swanky layered drinks? First, you’ll need to wrap your head around density. It’s the secret sauce behind those perfect layers, and it’s all about how heavy or light a liquid feels. Dive into this, and you’ll be on your way to mastering the art of the pour.
Sugar content plays a big role. Liquids like syrups and sweet liqueurs are packed with sugar, meaning they’re denser. This makes them the perfect base for stacking other liquids on top. So if your drink needs a solid foundation, start with the sugary stuff.
On the flip side, you’ve got alcohol content making things lighter. Higher alcohol levels usually mean a liquid’s less dense. Think vodka, gin, or rum—these float above the sugary layers like a dream. That’s why they work wonders at the top of your creation.
Temperature can be a game-changer too. Cooler temps slightly increase density, so chilling your ingredients can help keep those layers intact. Then there’s the secret of added ingredients, but sugar and alcohol are your main players here when crafting those Instagram-worthy drinks. Understanding these basics of density lets you layer like a pro, combining scientific smarts with bartending flair.
Essential Tools for Perfectly Layered Drinks
When it comes to layering drinks like a pro, the right tools can make or break your presentation. Sure, it’s about technique, but let’s not forget how having the right gear makes life a whole lot easier.
Layering drinks is more than just a party trick—it’s a blend of science, art, and a touch of finesse. Whether you’re hosting a cocktail night or just want to impress your friends with Instagram-worthy beverages, using the right tools can make all the difference. Here’s a breakdown of the must-haves for perfectly layered drinks, plus a few tips to get you started.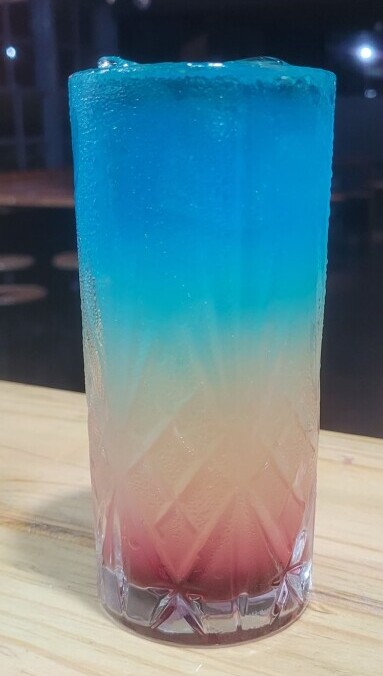
1. Glassware: Your Canvas for Creativity
When it comes to layered drinks, the glass is more than just a vessel—it’s your stage. Tall, clear glasses are essential for showcasing the distinct layers of your creation. Their height gives you the room to build each layer with precision, while the transparency allows every colorful component to shine.
Want proof? Science backs this up! Our perception of taste is influenced by visual appeal. A 2015 study published in the journal Flavor found that presentation significantly enhances how we perceive the taste of food and drinks. So, invest in some high-quality glassware, and let your drinks do the talking.
2. Bar Spoon: The Unsung Hero of Layering
If you think a bar spoon is just another piece of shiny barware, think again. This tool is indispensable for achieving that clean, distinct layering.
Here’s why it works:
- Long handle: Perfect for reaching deep into tall glasses without disturbing the bottom layers.
- Flat back: The real magic happens here. By pouring liquids gently over the back of the spoon, you control the flow, ensuring the liquids settle gently on top of each other without mixing.
Professional bartenders swear by this technique, and it’s easier than you think to master. Start with heavier liquids like grenadine or crème de cassis at the bottom and work your way up to lighter ones like juices or spirits.
3. Pouring Spouts: Precision Made Simple
While not strictly essential, pouring spouts are a game-changer for beginners and pros alike. They attach to your bottles and regulate the flow of liquid, giving you greater control over how quickly or slowly you pour. This is particularly important when creating layers, where precision is key.
- Why they matter: Pouring spouts minimize the chances of spills and over-pours, making them perfect for maintaining those crisp, clean layers.
- Pro tip: If you don’t have pouring spouts, try using a steady hand and a small measuring cup or a squeeze bottle for similar control.
Bonus Tips for Perfect Layers
- Density matters: The secret to layering lies in understanding the density of liquids. Syrups and liqueurs, which are heavier, should go at the bottom, while lighter ingredients like juices or spirits float on top. Tools like density charts (easily found online) can help you plan your layers.
- Chill ingredients: Cooler liquids are less likely to mix during pouring, so refrigerate your components beforehand.
Mastering the Art of Layering Drinks
Creating flawlessly layered drinks is a skill anyone can learn. The key is understanding liquid densities and using the right technique.
The Basics: Building a Strong Foundation
The key to layering is understanding density—how heavy or light a liquid is. Sugar-rich liquids like syrups and liqueurs are denser and sink to the bottom, while higher-alcohol spirits like vodka, gin, and rum are less dense and float on top. Temperature also plays a role; colder liquids are slightly denser. The densest liquid forms the foundation of your layered drink.
The Bar Spoon Technique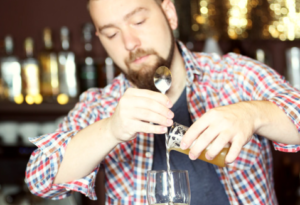
The key to layering is understanding density—how heavy or light a liquid is. Sugar-rich liquids like syrups and liqueurs are denser and sink to the bottom, while higher-alcohol spirits like vodka, gin, and rum are less dense and float on top. Temperature also plays a role; colder liquids are slightly denser. The densest liquid forms the foundation of your layered drink.
- Pro tip: Position the spoon at a slight angle to the glass for even better control.
Pouring Precision: Slow and Steady Wins the Race
Layering is all about precision. Pouring too fast creates chaos, while pouring too slow can result in uneven lines or unintended blending. Imagine you’re painting a masterpiece—every pour is a delicate stroke. Stay steady, take your time, and let gravity do its work.
Practice Makes Perfect
Learning to layer is like riding a bike. Start small with simple two-layer drinks to get a feel for the technique. Once you’re comfortable, challenge yourself with more intricate creations like the vibrant Rainbow Cocktail or the layered elegance of a B-52 shot.
The B-52 (NEW)
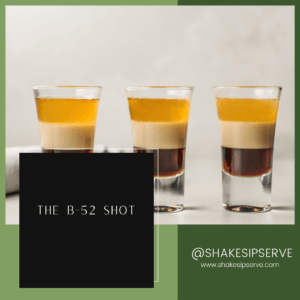
- Ingredients:
- 1/3 oz Kahlúa
- 1/3 oz Baileys Irish Cream
- 1/3 oz Grand Marnier
- Instructions:
- Pour the Kahlúa into a shot glass.
- Using the back of a bar spoon, carefully layer the Baileys Irish Cream on top of the Kahlúa.
- Finally, using the bar spoon again, carefully layer the Grand Marnier on top of the Baileys.
Tips, Tricks, and Troubleshooting for Layering Success
Here are some additional hacks to elevate your game:
- Chill Everything Cold liquids are slightly denser than their room-temperature counterparts, making them easier to stack neatly. Plus, chilling enhances the visual clarity of each layer.
- Master the Steady Pour Consistency is key. Use pouring spouts or small measuring cups for better control. A steady hand is your best friend here.
- Avoid Disrupting Layers Never let your spoon touch the liquid underneath—it can disrupt your hard-earned layers. Keep it just above the surface of the previous layer for best results.
- Check Density Differences If your layers are blending together, the density gap between your liquids might be too small. Use a density chart as a guide, and select liquids with significant variations.
What to Do if It All Goes Wrong
Mistakes happen, especially when you’re starting out. If your layers start blending, don’t panic—it’s a chance to learn. Analyze what went wrong:
- Was your pour too fast? Slow it down.
- Were your liquids too similar in density? Adjust your ingredient choices.
Remember, layering is a skill that improves with practice. Each attempt is a step closer to mastering the art.
Your Layering Starter Pack
For some colorful practice, try these crowd-pleasers:
- B-52 Shot: A classic with three distinct layers—Kahlúa, Baileys Irish Cream, and Grand Marnier.
- Rainbow Cocktail: A vibrant, multi-layered drink that’s as fun to make as it is to sip.
Remember, no one’s perfect at this technique right from the get-go. Each attempt boosts your skills, so keep experimenting. Start with tried-and-true classics like the B-52 or a Rainbow Cocktail for some colorful practice. Before you know it, you’ll be layering like a seasoned mixologist.
Thanks for joining us behind the bar!
The bartending community is a vibrant and supportive one, and I’m excited to build that community here on Shake, Sip, Serve. I’d love to hear your thoughts, questions, and experiences in the comments below. What are you shaking up these days? What topics would you like to see covered in future posts? Let’s connect and continue the conversation!

Read more:
Blending Cocktails Like A Pro: A Detailed Step-by-step Process
Mastering The Process Of Flame-torching Cocktail Garnishes
Creating Flavored Syrups For Cocktails: A Step-by-step Approach
Process Of Layering Drinks For A Stunning Presentation
Step-by-step Guide To Creating The Perfect Cocktail
Process Of Garnishing Drinks Like A Pro
Mastering The Art Of Shaking Cocktails Step-by-step
Crafting Infusions In Cocktails: A Detailed Process
Step-by-step Manual On Muddling Fruits For Cocktails
Step-by-step Guide To Stocking A Home Bar Effectively