
The Rise of Home Mixology Enhance Your Essential Mixology Techniques At Home
Welcome to the thrilling world of home mixology! Whether you’re an experienced home bartender or a curious beginner, mastering essential mixology techniques can transform your cocktail game and impress your friends and family. This comprehensive guide will cover everything you need to know to create stunning, delicious drinks right in your own kitchen.
Mixology, the art and science of crafting cocktails, has surged in popularity over recent years, particularly among home bartenders. As more people seek creative ways to enjoy and share drinks, the desire to perfect mixology techniques has grown. This trend has led to a renaissance in cocktail culture, with home enthusiasts experimenting with classic recipes and innovative concoctions alike.
The Social and Cultural Impact
Mixology isn’t just about making drinks; it’s about enhancing social experiences and creating memorable moments. Crafting a well-made cocktail can be a form of self-expression, a way to celebrate occasions, or simply a way to unwind after a long day. The rise of home mixology reflects a broader cultural shift towards appreciating quality, craftsmanship, and the joy of creating something unique.
The Science Behind the Art
Mixology combines elements of chemistry, biology, and artistry. Understanding how different ingredients interact, how temperature affects flavor, and how to balance sweet, sour, bitter, and umami components can elevate your cocktail-making skills. This scientific approach to mixology helps explain why certain techniques and tools are essential for creating the perfect drink.
Essential Tools for the Aspiring Mixologist
Before diving into the techniques, it’s crucial to have the right tools. A well-equipped home bar is the first step toward successful mixology. Here’s a comprehensive list of the essentials:
Cocktail Shaker
The cocktail shaker is a fundamental tool in any bartender’s arsenal.
There are two main types to consider:
Boston Shaker: Consists of two parts – a metal tin and a mixing glass. This shaker is favored by many professionals for its versatility and ease of use. It requires a separate strainer to remove ice and solid ingredients.
Cobbler Shaker: A three-part shaker with a built-in strainer. It’s easier for beginners to use and is perfect for making a wide range of cocktails.
Jigger: A jigger is a small, hourglass-shaped measuring tool that ensures you pour accurate amounts of spirits and mixers. Precision is essential for creating balanced cocktails, and a jigger helps you achieve that with ease.
Bar Spoon: Longer than a regular spoon, the bar spoon is designed for stirring drinks and layering cocktails. Its twisted handle allows for smooth stirring, which is crucial for mixing ingredients evenly without over-aerating them.
Muddler: A muddler is used to crush fruits, herbs, and spices in the bottom of a glass to release their flavors. This tool is essential for cocktails like the Mojito, where the flavors of mint and lime are key components.
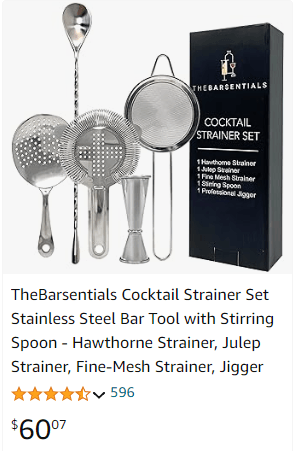
Strainer:
There are two main types of strainers you should have:
Hawthorne Strainer: Features a metal spring and is used with a shaker tin to keep ice and solid ingredients out of the finished drink.
Julep Strainer: A perforated metal spoon used primarily with a mixing glass to strain stirred cocktails.
Mixing Glass: A mixing glass is used for stirring cocktails that don’t require shaking. It’s typically made of thick glass to withstand temperature changes and provide stability while stirring.
Citrus Juicer: Fresh juice makes a significant difference in the taste of cocktails. A citrus juicer helps you extract juice from lemons, limes, and oranges, ensuring that your cocktails have the freshest possible flavor.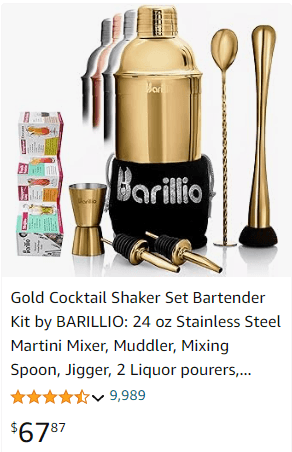
Additional Tools
Peeler: For creating citrus twists and garnishes.
Zester: For adding a burst of citrus aroma to your drinks.
Ice Tongs or Scoop: For handling ice in a hygienic manner.
Measuring Cups and Spoons: For precise measurements of mixers and other ingredients.
Bottle Opener and Corkscrew: For opening bottles of wine, beer, and spirits.
Shaking vs. Stirring: The Great Debate
One of the fundamental decisions in mixology is whether to shake or stir your cocktail. Both techniques have their place, and knowing when to use each can significantly impact the texture and dilution of your drinks.
The Purpose of Shaking
Shaking is typically used for cocktails that contain fruit juices, dairy, or egg whites. The vigorous action of shaking thoroughly mixes the ingredients, aerates the drink, and chills it quickly. The result is a well-mixed, frothy cocktail with a smooth texture.
How to Shake Properly
Fill the Shaker with Ice: Add ice cubes to the shaker, filling it about two-thirds full.
Add Ingredients: Pour the liquid ingredients into the shaker.
Seal the Shaker: If using a Boston shaker, place the mixing glass into the metal tin at a slight angle to create a seal. For a Cobbler shaker, fit the top part onto the bottom.
Shake Vigorously: Hold the shaker with both hands (one on the top and one on the bottom) and shake with a back-and-forth motion. Shake for about 15-20 seconds until the outside of the shaker becomes frosty.
Strain and Serve: Use a strainer to pour the cocktail into a glass, leaving the ice and solid ingredients behind.
The Purpose of Stirring
Stirring is the preferred method for spirit-forward cocktails like the Martini or Manhattan. This technique gently combines the ingredients, preserving clarity and creating a silky texture. Stirring is less aggressive than shaking, which helps maintain the integrity of the spirits and avoids over-dilution.
How to Stir Properly
Fill the Mixing Glass with Ice: Add ice cubes to the mixing glass.
Add Ingredients: Pour the liquid ingredients over the ice.
Stir Gently: Use a bar spoon to stir the mixture in a circular motion. Stirring should be gentle but deliberate, ensuring that the ingredients mix evenly and the drink chills thoroughly.
Strain and Serve: Use a Julep strainer to pour the cocktail into a glass, leaving the ice behind.
Mastering the Muddle
Muddling is the technique of crushing ingredients to release their flavors and is essential for cocktails that rely on fresh herbs and fruits. Mastering this technique can significantly enhance the taste of your drinks.
Steps to Perfect Muddling
Select Fresh Ingredients: Use fresh herbs (like mint or basil) and ripe fruits (like berries or citrus) for the best results.
Place Ingredients in a Sturdy Glass: A sturdy glass, such as a rocks glass or a mixing glass, provides a stable base for muddling.
Muddle with Care: Use a muddler to press down and twist gently. Avoid over-muddling, as it can release bitter compounds from herbs. The goal is to crush the ingredients just enough to release their essential oils and juices.
Add Liquid Ingredients: After muddling, add the remaining liquid ingredients to the glass and continue with the recipe.
Common Muddling Mistakes
Using Too Much Force: Pressing too hard can release undesirable flavors from herbs and fruits.
Overcrowding the Glass: Muddle in small batches to ensure even extraction of flavors.
Using the Wrong Glass: Avoid using delicate glassware, as it can break under pressure.
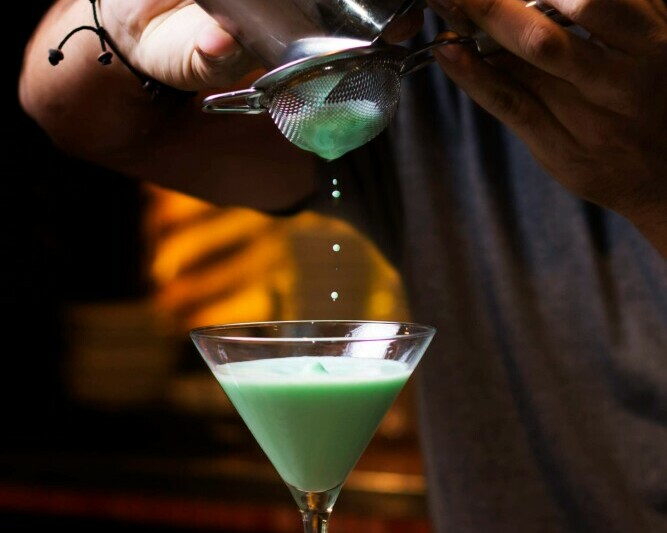
The Fine Art of Straining
Straining is an essential step in mixology that ensures your cocktail is smooth and free of unwanted solids. Double straining, which involves using both a Hawthorne strainer and a fine mesh sieve, is particularly effective for achieving a clear drink.
Types of Strainers and Their Uses
Hawthorne Strainer: With its metal spring, this strainer is ideal for use with a shaker tin. It catches ice and solid ingredients, allowing only the liquid to pass through.
Julep Strainer: This perforated metal spoon is used with a mixing glass. It’s perfect for straining stirred cocktails.
How to Double Strain
Shake or Stir the Cocktail: Prepare your cocktail as usual.
Place the Hawthorne Strainer: Fit the Hawthorne strainer over the top of the shaker tin.
Hold the Fine Mesh Sieve: Hold the fine mesh sieve over the serving glass.
Pour Through Both Strainers: Pour the cocktail through the Hawthorne strainer and then through the fine mesh sieve. This process catches any remaining ice shards or solid ingredients, resulting in a perfectly smooth cocktail.
Creating Visual Appeal: Layering Drinks
Layering drinks can make your cocktails look stunning and add a new dimension to your mixology skills. This technique involves carefully pouring liquids of different densities to create visually distinct layers.
Steps to Layer a Drink
Select Your Ingredients: Choose liquids with different densities. Typically, heavier ingredients like syrups and liqueurs go at the bottom, while lighter ingredients like juices and spirits float on top.
Use the Back of a Spoon: Hold a spoon upside down over the glass, with the tip of the spoon just above the previous layer.
Pour Slowly and Gently: Slowly pour the next liquid over the back of the spoon. This helps to disperse the liquid gently and prevent it from mixing with the previous layer.
Practice: Perfecting this technique requires practice and patience. Don’t be discouraged by initial failures; with time, you’ll master the art of layering.
Popular Layered Cocktails
B-52: A shot consisting of Kahlúa, Baileys Irish Cream, and Grand Marnier.
Pousse Café: A classic layered drink with various liqueurs like grenadine, green crème de menthe, and brandy.
Tequila Sunrise: A beautiful blend of grenadine, orange juice, and tequila.
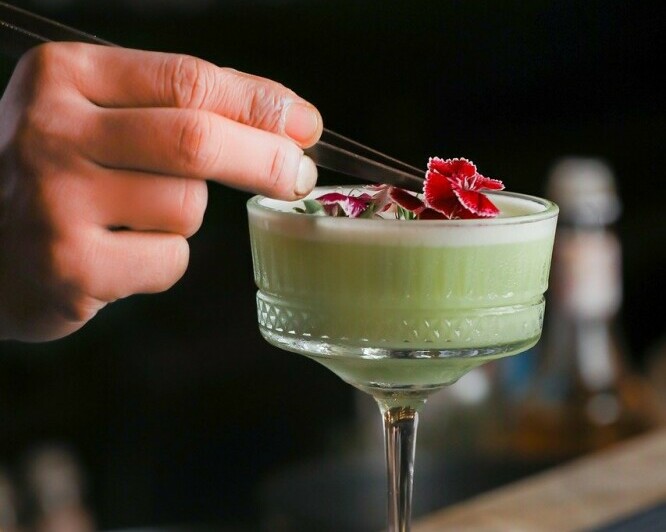
Garnishing Like a Pro
A well-chosen garnish can enhance the flavor, aroma, and appearance of your cocktail. Here are some tips for garnishing like a pro:
Common Garnishes and Their Uses
Citrus Twists and Peels: Citrus garnishes add a touch of elegance and a burst of aroma. Use a peeler or zester to create twists or peels from lemons, limes, and oranges.
Fresh Herbs: Herbs like mint, basil, and rosemary can add a fresh, aromatic touch to your cocktails. Lightly slap the herbs between your palms before adding them to release their essential oils.
Edible Flowers: Elevate your drink with visually stunning and edible flowers. Ensure the flowers are safe to consume and pesticide-free.
Dehydrated Fruit: Dehydrated fruit slices provide a modern, stylish look and an intensified flavor.
Tips for Perfect Garnishing
Select Fresh, High-Quality Ingredients: Fresh garnishes not only look better but also enhance the drink’s aroma and flavor.
Match the Garnish to the Drink: Ensure the garnish complements the flavors of the cocktail. For example, a sprig of mint pairs well with a Mojito, while a lemon twist is perfect for a Martini.
Be Creative: Don’t be afraid to experiment with unique garnishes. Try using ingredients like candy, spices, or even small pieces of edible art.
Experimentation and Homemade Ingredients
One of the joys of home mixology is the ability to experiment with different flavors and create your own ingredients. Homemade syrups and infusions can add a personal touch to your cocktails and allow you to customize drinks to your taste.
Making Simple Syrup
Simple syrup is a basic ingredient in many cocktails. It’s easy to make and can be flavored with various ingredients.
Basic Simple Syrup Recipe
Ingredients: Equal parts water and sugar.
Method: Combine the water and sugar in a saucepan. Heat gently, stirring until the sugar dissolves completely. Allow to cool before using.
Flavored Simple Syrups
To create flavored simple syrups, add herbs, spices, or fruits to the basic recipe:
Herb-Infused Syrup: Add fresh herbs like mint, basil, or rosemary to the syrup while it’s still hot. Let it steep for 30 minutes, then strain out the herbs.
Spice-Infused Syrup: Add whole spices like cinnamon sticks, cloves, or star anise to the syrup. Let it steep until the desired flavor is achieved, then strain out the spices.
Fruit-Infused Syrup: Add fresh or frozen fruit to the syrup. Simmer until the fruit breaks down, then strain out the solids.
Infusing Spirits
Infusing spirits with herbs, fruits, or spices can add unique flavors to your cocktails.
Here’s how to do it:
Choose Your Base Spirit: Vodka, gin, and rum are popular choices for infusions due to their relatively neutral flavors.
Select Your Flavoring Ingredients: Fresh herbs, fruits, spices, and even vegetables can be used for infusions.
Combine and Steep: Add the flavoring ingredients to the spirit in a clean, airtight container. Let it steep for several days, shaking the container occasionally to distribute the flavors.
Taste and Strain: Taste the infusion periodically until the desired flavor is achieved. Strain out the solids and store the infused spirit in a clean bottle.
Experimenting with Flavors
Don’t be afraid to get creative with your flavor combinations.
Some ideas to get you started:
Cucumber and Mint Vodka: Refreshing and perfect for summer cocktails.
Vanilla Bean and Cinnamon Rum: Adds warmth and complexity to winter drinks.
Berry-Infused Gin: A fruity twist on a classic spirit.
Caring for Your Tools
Maintaining your mixology tools is crucial for their longevity and your drink’s hygiene. Proper care ensures that your tools perform well and last for years.
Cleaning and Maintenance Tips
Clean Immediately: Rinse tools right after use to prevent residue build-up. This is especially important for tools that come into contact with sticky or acidic ingredients.
Thorough Cleaning: Regularly wash your tools thoroughly with warm, soapy water. Pay special attention to the nooks and crannies where residue can accumulate.
Dry Completely: Ensure your tools are completely dry before storing them to avoid rust and bacterial growth.
Store Properly: Store your tools in a dry place, preferably in a dedicated bar area. Keeping them organized and accessible will make your mixology practice more efficient.
Specific Tool Care
Shaker Tins: Wash thoroughly and dry immediately to prevent rust. Avoid using abrasive sponges that can scratch the metal.
Jiggers and Spoons: Rinse after each use and wash regularly. Ensure they are dry before storing.
Muddlers: Wooden muddlers should be hand-washed and dried immediately. Avoid soaking them in water to prevent cracking.
Strainers: Clean the springs of Hawthorne strainers thoroughly to remove trapped residue. Julep strainers should be washed and dried after each use.
Conclusion: Share Your Creations
Now that you’re equipped with essential mixology techniques, it’s time to practice and perfect your craft. The joy of home mixology lies in experimentation and creativity, so don’t hesitate to try new recipes and techniques. Share your creations with friends and family, and encourage them to explore the world of home mixology alongside you.
Join the Mixology Community
Connecting with other home bartenders can provide inspiration and feedback. Share your experiences and recipes on social media using hashtags like #HomeMixology and #CocktailCrafting. Participate in online forums and local mixology events to learn from others and showcase your skills.
Keep Learning
Mixology is a journey of continuous learning. Stay curious and keep exploring new ingredients, techniques, and trends. Subscribe to mixology blogs, follow industry influencers, and take online courses to further enhance your knowledge and skills.
Celebrate Your Progress
Remember to celebrate your progress and enjoy the process. Each cocktail you make is a step towards mastering the art of mixology. Whether you’re crafting a classic cocktail or creating a new recipe, take pride in your achievements and savor the moment.
By mastering these essential mixology techniques, you’ll not only enhance your cocktail-making skills but also create memorable experiences for yourself and your guests. Cheers to your home mixology journey!
Read More:
Bartending Skills For Beginners
Mixology Techniques At Home
Creative Cocktail Garnish Ideas
Sustainable Bartending Practices
Seasonal Cocktail Recipes
Alcohol-free Mixology
Customer Service Tips For Bartenders
History Of Classic Cocktails
Disclaimer: This post contains affiliate links. If you purchase through these links, I may earn a small commission at no additional cost to you.