
Laying the Foundation: Bartending Skills For Beginners
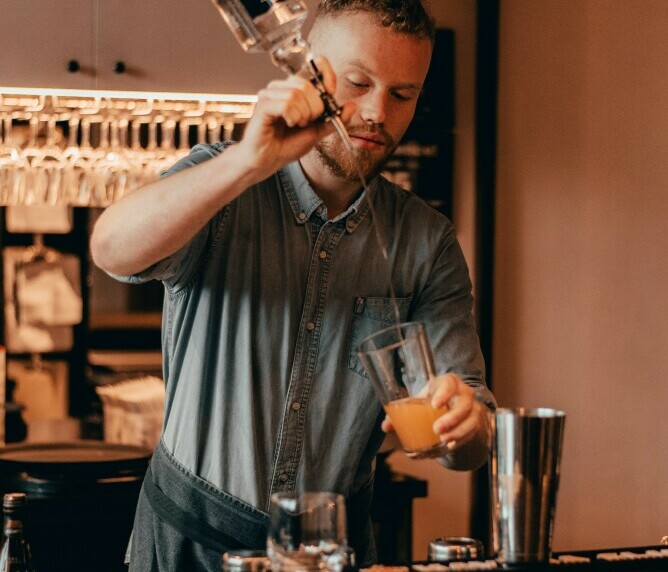
Have you ever been dazzled by a bartender’s lightning-fast moves, expertly crafting cocktails with an array of unfamiliar tools? Fear not, aspiring mixologist! This guide unveils the secrets of Bartending Skills For Beginners, the bartender’s toolkit, empowering you to create delicious drinks at home.
The Essential Tools:
This section dives into the various tools you’ll need for bartending, including their functions and importance.
- Shaker: This two-piece metal container (think Boston Shaker or Cobbler Shaker) is where the magic happens. Shaking chills drinks emulsifies ingredients, and creates a frothy texture.
- Bar Spoon: Long and slender, this spoon allows for effortless stirring in tall glasses and layering ingredients without disrupting them.
- Jigger: This double-sided measuring tool ensures precise proportions in your cocktails. A balanced recipe is key to a perfect drink!
- Strainer: There are two main types: Hawthorne strainer (with a spring) for catching ice and larger chunks, and fine mesh strainer for removing finer particles.
- Muddler: This sturdy tool helps extract flavor from fruits, herbs, and spices by muddling them in the glass.
- Citrus Peeler: Forget the serrated edge of your knife! This specialized tool creates beautiful, fragrant citrus twists for garnish.
- Bar Knife: A short, serrated knife allows for precise cutting and garnishing of fruits and vegetables.
Bonus Tools:
- Mixing Glass: For stirred cocktails that require gentle dilution, a mixing glass with a pouring spout offers a sophisticated touch.
- Hawthorne Jigger: This four-sided jigger provides additional measurement options for those adventurous cocktail recipes.
- Ice Scoop: A dedicated ice scoop maintains hygiene and prevents spills when filling your shaker or glass.
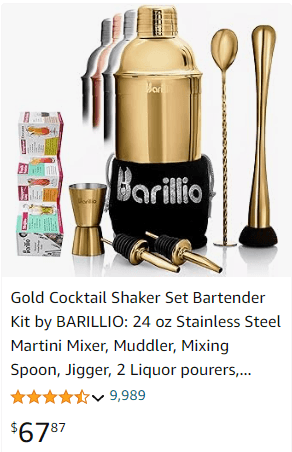
Pro Tip: Invest in a sturdy, well-made toolkit. Stainless steel is a popular choice for its durability and ease of cleaning.
> Check out our review on the Amazon must-have bar kit here <
Beyond the Tools:
Understanding the tools is just the first step. Remember, a well-stocked bar with high-quality ingredients is equally important.
Mastering the Art of Measuring and Pouring: Precision for Perfect Cocktails
The foundation of any great cocktail lies in balanced flavor, and that all starts with precise measuring and pouring. This section offers a guide to becoming a master of the pour, ensuring consistent and delicious drinks every time.
The Art of Measurement
- Know your tools: Familiarize yourself with common measuring tools like jiggers (double-sided for two measurements) and bar spoons (often marked with measurements).
- Metric vs. Imperial: Be aware of the recipe’s measurement system (metric in milliliters or imperial in ounces) and use the appropriate tools.
- The Meniscus: That curve at the top of the liquid in your measuring tool? It’s called the meniscus. Aim to fill the tool to just above the meniscus for accurate measurement.
Mastering the Pour:
- Control is Key: Hold the bottle firmly and pour steadily to avoid spills or over-pouring.
- The Slow Pour: For precise measurements, especially with small quantities, opt for a slow, controlled pour, aiming for a thin stream.
- Free Pouring: Experienced bartenders use “free pouring” – pouring without measuring – relying on muscle memory and timing. Practice at home with water before attempting this with precious liquor! Here’s how:
- Counting Technique: Count “one-Mississippi, two-Mississippi” for a half-ounce pour. Adjust the count for different measurements as you gain experience.
- Consistency is King: Maintain a consistent pouring speed and angle for reliable results.
Pro Tips:
- Practice Makes Perfect: Fill a shaker with water and practice pouring precise amounts using both measured and free-pouring techniques.
- Chill Out: Always use chilled glasses and tools to maintain the perfect temperature in your cocktails.
- Clean as You Go: Rinse your jigger and bar spoon between uses to avoid flavour contamination.
Beyond the Basics:
- Splash vs. Dash: Recipes often call for “dashes” of bitters or syrups. A dash is typically a quick, light pour, while a splash allows for slightly more flavour.
- Building vs. Shaking: Some cocktails are built directly in the glass, while others require shaking with ice to achieve proper dilution and texture. Understand the technique your recipe calls for.
The Building Blocks:
- Spirits: The alcoholic base of most cocktails, like vodka, gin, rum, tequila, whiskey, etc.
- Liqueurs & Liqueurs: Sweetened, flavoured spirits often used in smaller amounts to add complexity (e.g., amaretto, Cointreau).
- Mixers: Non-alcoholic ingredients that dilute the spirit and add flavour (e.g., juices, sodas, syrups).
- Garnish: The edible (or sometimes visual) finishing touch on a cocktail, adding flavour, aroma, or visual appeal (e.g., citrus twists, fruit slices, herbs).
Mixing Methods:
- Stirred: Gentler method using a bar spoon for cocktails that don’t require dilution or froth (e.g., Old Fashioned, Manhattan).
- Shaken: Creates a frothy texture and chills the drink by combining ingredients with ice in a shaker (e.g., Margarita, Daiquiri).
- Blended: Uses a blender to create smooth, icy drinks often with fruit or cream (e.g., Piña Coladas, Margaritas).
- Built: Layered directly in the glass, showcasing the colour contrast of ingredients (e.g., Bloody Mary, Irish Coffee).
Essential Techniques:
- Muddling: Pressing fruits, herbs, or spices in the bottom of the glass to release their flavours.
- Rimming: Coating the rim of the glass with sugar, salt, or spices for added flavour and texture.
- Float: Gently pouring a spirit or mixer on top of another ingredient to create a layered effect.
Serving Styles:
- Neat: Spirit served alone, without ice or mixers (typically for sipping).
- On the Rocks: Spirit served over ice in a rocks glass (Old Fashioned glass).
- Up: Cocktail served chilled, without ice, in a stemmed glass (Coupette, Martini glass).
Bonus Terms:
- ABV: Alcohol By Volume – the percentage of alcohol in a beverage.
- Dash: A very small amount of liquid, usually a quick pour from a bitters bottle.
Essential Cocktail Recipes for Beginners
Get started with your bartending journey with these classic and easy-to-make cocktails:
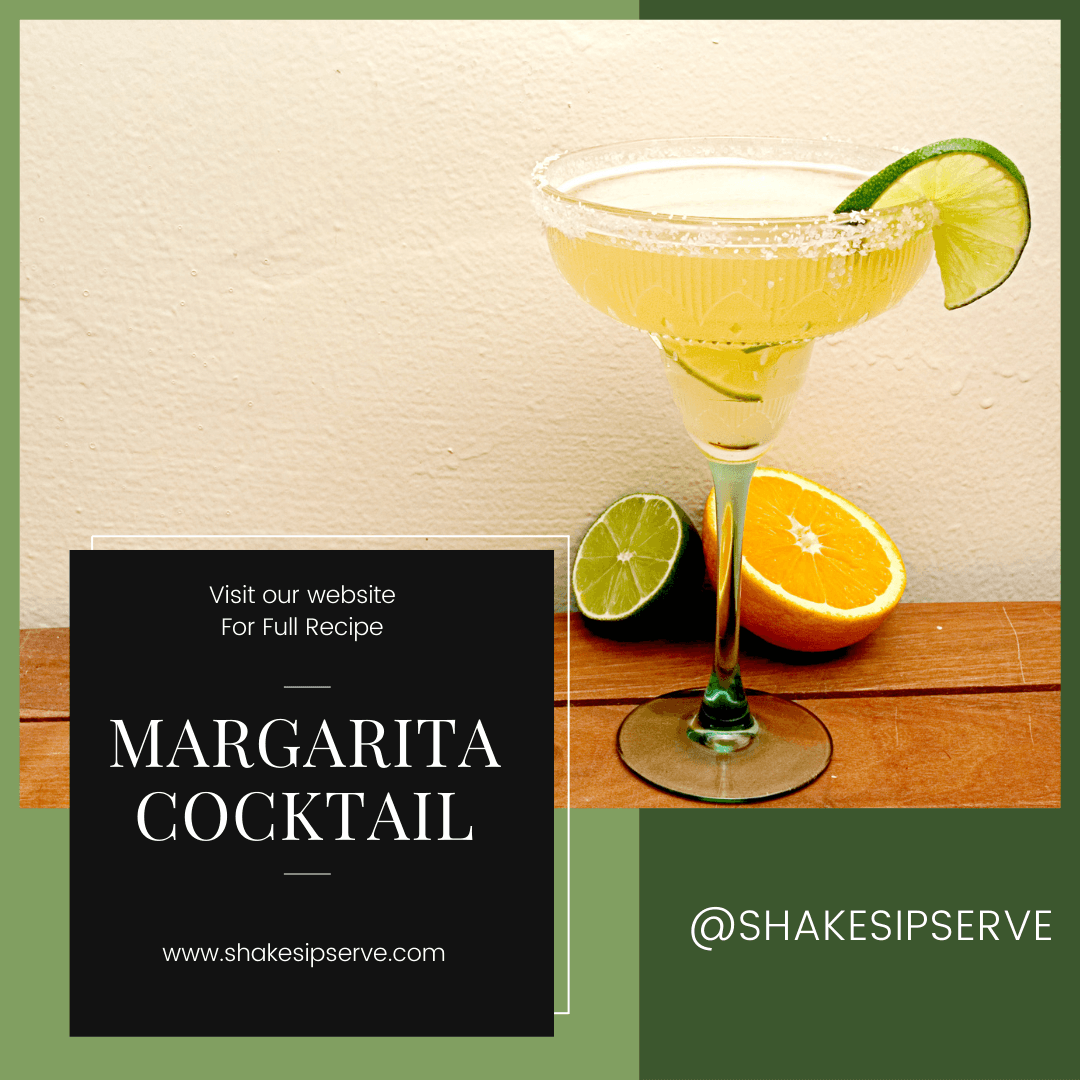
1. Margarita
 Ingredients:
- 2 oz tequila
- 1 oz lime juice
- 1 oz triple sec
- Salt for rimming the glass (optional)
- Lime wedge for garnish
Instructions:
- Rim the edge of a glass with salt (if desired) by rubbing a lime wedge around the rim and dipping it in salt.
- Combine tequila, lime juice, and triple sec in a shaker with ice.
- Shake well and strain into the glass.
- Garnish with a lime wedge.
2. Mojito
Ingredients:
- 2 oz white rum
- 1 oz lime juice
- 2 tsp sugar
- 6-8 fresh mint leaves
- Soda water
- Lime wedge and mint sprig for garnish
Instructions:
- Muddle mint leaves, lime juice, and sugar in a glass.
- Fill the glass with ice.
- Add rum and stir gently.
- Top with soda water.
- Garnish with a lime wedge and mint sprig.
3. Old Fashioned
Ingredients:
- 2 oz bourbon or rye whiskey
- 1 sugar cube or 1 tsp sugar
- 2-3 dashes Angostura bitters
- Orange twist and cherry for garnish
Instructions:
- Place the sugar cube in a glass and saturate with bitters.
- Add a splash of water and muddle until the sugar is dissolved.
- Fill the glass with ice and add the whiskey.
- Stir gently.
- Garnish with an orange twist and cherry.
4. Cosmopolitan
Ingredients:
- 1 1/2 oz vodka
- 1 oz cranberry juice
- 1/2 oz triple sec
- 1/2 oz lime juice
- Lime twist for garnish
Instructions:
- Combine vodka, cranberry juice, triple sec, and lime juice in a shaker with ice.
- Shake well and strain into a chilled martini glass.
- Garnish with a lime twist.
Techniques to Perfect: Shaking, Stirring, and Beyond
Now that you have the essential tools, it’s time to learn some fundamental techniques. Mastering these will help you create a wide range of drinks with confidence.
1. Shaking
Shaking is used to thoroughly mix and chill drinks, especially those with fruit juices, cream, or egg whites.
How to Shake:
- Add ingredients and ice to the shaker.
- Close the shaker securely.
- Hold the shaker with both hands (one on each end) and shake vigorously for about 10-15 seconds.
- Strain the cocktail into the appropriate glass.
2. Stirring
Stirring is used for cocktails that contain only spirits and other clear ingredients, such as the Martini.
How to Stir:
- Add ingredients and ice to a mixing glass.
- Insert the bar spoon and stir gently in a circular motion for about 20-30 seconds.
- Strain the cocktail into the appropriate glass.
3. Muddling
Muddling releases the flavors of fresh ingredients like herbs and fruits.
How to Muddle:
- Place the ingredients in the bottom of a sturdy glass.
- Use the muddler to press down and twist gently, bruising the ingredients to release their flavors.
- Add the rest of the ingredients and proceed with the recipe.
4. Layering
Layering creates visually appealing drinks by carefully pouring ingredients on top of each other.
How to Layer:
- Hold a bar spoon upside down over the glass.
- Slowly pour the liquid over the back of the spoon, allowing it to gently settle on top of the previous layer.
- Continue with the remaining ingredients.
Building Your Knowledge: Understanding Spirits and Mixers
A good bartender knows their ingredients inside and out. Here’s a basic overview of the most common spirits and mixers you’ll use:
1. Spirits
Vodka
- Flavor: Typically neutral, making it versatile for many cocktails.
- Common Cocktails: Martini, Bloody Mary, Cosmopolitan.
Gin
- Flavor: Botanical, with juniper as the dominant flavor.
- Common Cocktails: Martini, Negroni, Gin and Tonic.
Rum
- Flavor: Sweet and molasses-like, with variations depending on aging.
- Common Cocktails: Mojito, Daiquiri, Piña Colada.
Tequila
- Flavor: Earthy and spicy, made from the blue agave plant.
- Common Cocktails: Margarita, Tequila Sunrise, Paloma.
Whiskey
- Flavor: Varies by type (bourbon, rye, scotch) but generally robust and complex.
- Common Cocktails: Old Fashioned, Manhattan, Whiskey Sour.
Brandy
- Flavor: Fruity and rich, made from distilled wine.
- Common Cocktails: Sidecar, Brandy Alexander.
2. Mixers
Juice
- Freshly squeezed juice (lemon, lime, orange) is always best for cocktails.
Soda
- Club soda, tonic water, and ginger beer are essential mixers for many drinks.
Syrups
- Simple syrup (equal parts sugar and water) is a staple, along with flavored syrups like grenadine.
Bitters
- Aromatic bitters like Angostura add depth and complexity to cocktails.
The Art of Garnishing: Elevate Your Drinks
Garnishes are more than just decoration; they enhance the flavor and presentation of your cocktails. Here are some popular garnishes and how to use them:
1. Citrus Twists
- How to Use: Peel a strip of zest from a lemon, lime, or orange, twist it over the drink to release the oils, and drop it in or hang it on the glass rim.
2. Fresh Herbs
- How to Use: Slap herbs like mint or basil between your hands to release their aroma, then place them in the drink.
3. Fruits
- How to Use: Slice or wedge fruits like cherries, olives, and berries for a colorful and flavorful touch.
4. Edible Flowers
- How to Use: Float edible flowers on the surface of the drink for a visually stunning presentation.
 Mastering Customer Service: The Key to a Great Bartending Experience
Being a great bartender isn’t just about making fantastic drinks; it’s also about providing exceptional customer service. Here are some tips to help you excel:
1. Greet Your Guests
- Tip: Always greet guests with a smile and make eye contact. A warm welcome sets the tone for a positive experience.
2. Be Attentive
- Tip: Pay attention to your guests’ needs and be ready to offer recommendations or refills. Remember their names and favorite drinks for a personal touch.
3. Stay Calm Under Pressure
- Tip: During busy times, stay organized and keep your cool. Prioritize tasks and communicate clearly with your team.
4. Handle Complaints Gracefully
- Tip: If a guest has a complaint, listen attentively, apologize sincerely, and offer a solution to resolve the issue.
5. Know Your Menu
- Tip: Be familiar with the bar’s drink menu and be able to answer questions about ingredients, flavors, and preparation methods.
Practicing and Perfecting Your Skills
Like any craft, bartending requires practice to perfect. Here are some ways to hone your skills:
1. Home Practice
- Tip: Set up a mini-bar at home and practice making different cocktails. Focus on perfecting your shaking, stirring, and muddling techniques.
2. Watch and Learn
- Tip: Watch tutorial videos and read bartending books to learn new recipes and techniques. Attend bartending workshops or classes if possible.
3. Experiment
- Tip: Don’t be afraid to experiment with new ingredients and create your own signature cocktails. Keep notes on what works and what doesn’t.
4. Get Feedback
- Tip: Serve your creations to friends and family and ask for their honest feedback. Use their input to improve your skills and recipes.
The Path to Professional Bartending
If you’re serious about pursuing a career in bartending, there are a few additional steps you can take to enhance your skills and increase your chances of landing a job.
1. Bartending School
- Tip: Enroll in a reputable bartending school to receive formal training and certification. This can boost your resume and provide valuable hands-on experience.
2. Work Your Way Up
- Tip: Start by working in entry-level positions, such as barback or server, to gain experience and learn the ropes. Show your dedication and eagerness to learn, and you’ll likely get promoted to bartender.
3. Network
- Tip: Attend industry events, join bartending associations, and connect with other professionals in the field. Networking can lead to job opportunities and mentorship.
4. Stay Updated
- Tip: Keep up with the latest trends and innovations in the bartending world. Follow influential bartenders and cocktail bars on social media, and continuously expand your knowledge and skills.
Demystifying the Mixology Jargon: A Beginner’s Guide to Cocktail Speak
Ever wondered what bartenders mean when they throw around terms like “neat,” “garnish,” or “muddle”? Fear not, aspiring mixologist! This guide unravels the mysteries of basic mixology terminology, empowering you to navigate cocktail recipes with confidence.
Shake it Up or Stir it Smooth: A Beginner’s Guide to Shaking vs. Stirring Cocktails
Ever wondered why some cocktails are shaken while others are gently stirred? It’s all about achieving the desired texture, temperature, and flavour profile in your drink. Here’s a beginner’s guide to mastering the art of shaking and stirring:
The Shaking Effect:
- When to Shake: Shaking is ideal for cocktails containing:
- Citrus Juices: Shaking helps break down pulp and distribute citrus oils for a more balanced flavour. (e.g., Margaritas, Daiquiris)
- Cream/Egg Whites: Shaking emulsifies these ingredients, creating a smooth and frothy texture. (e.g., Piña Coladas, Whiskey Sours)
- Multiple Ingredients: Shaking effectively combines ingredients that might otherwise separate, like juices and spirits. (e.g., B52)
- The Result: Shaking chills the drink rapidly, dilutes it slightly with melted ice, and creates a frothier texture due to aeration.
The Gentle Stir:
- When to Stir: Stirring is perfect for cocktails that:
- Focus on Spirits: Stirring preserves the spirit’s flavour profile and avoids excessive dilution. (e.g., Old Fashioned, Negroni)
- Clear Ingredients: A stirred drink maintains a clear, elegant look. (e.g., Martini, Manhattan)
- The Result: Stirring gently chills the drink and dilutes it minimally, allowing the spirit’s flavours to shine through.
Making the Call:
Here’s a handy rule of thumb:
- Cloudy Ingredients? Shake it! (Juices, cream, egg whites)
- Clear Ingredients? Stir it! (Mostly spirits)
Beyond the Basics:
- Some exceptions exist: A Vesper Martini, despite its clear appearance, is traditionally shaken for a touch of froth. Experiment and see what you prefer!
- Carbonation Caution: Don’t shake drinks with soda or sparkling water – it will result in a foamy mess. Stir gently or build these drinks in the glass.
Remember: The most important thing is to enjoy the process and discover what works best for your taste. So, experiment, have fun, and become a master of shaking and stirring your way to perfect cocktails!
Mastering the Art of Dilution: Achieving the Perfect Cocktail Texture
The magic of a well-crafted cocktail lies in its perfect balance of flavour, temperature, and texture. Dilution, achieved through shaking or stirring, plays a crucial role in achieving this harmony. Here’s a deep dive into understanding dilution and how to manipulate it for the perfect texture:
Dilution Demystified:
Dilution refers to the process of adding water (or liquids that contain water) to your cocktail. This can happen naturally through melting ice, or by adding ingredients like juices, sodas, or even syrups. The level of dilution significantly impacts the final texture and flavour profile of your drink.
Shaken vs. Stirred: The Texture Tale:
- Shaking: Creates a frothy, light, and well-chilled texture. Shaking introduces air bubbles, which expand as the ice melts, resulting in a lighter body and faster chilling.
This technique is ideal for cocktails with: - Citrus juices: Breaks down pulp and distributes oils for a smoother texture.
- Cream or egg whites: Creates a frothy, luxurious mouthfeel.
- Multiple ingredients: Ensures even distribution and prevents separation.
- Stirring: Creates a silky smooth, slightly chilled, and less aerated texture. Stirring gently chills the drink and dilutes it minimally, preserving the spirit’s character and creating a more elegant mouthfeel. This is perfect for cocktails with:
- Focus on spirits: Allows the spirit’s flavours to shine through without over-dilution.
- Clear ingredients: Maintains a visually appealing, clear presentation.
The Art of Controlled Dilution:
- Ice Matters: Larger ice cubes melt slower, providing more control over dilution. Chilling your mixing glass or shaker beforehand further minimizes ice melt.
- Stirring Technique: A slow, gentle stir for 15-30 seconds ensures proper chilling without excessive dilution.
- Shaking Time: Shake vigorously for 10-15 seconds for most cocktails. Over-shaking can lead to excessive dilution and a watery texture.
Beyond the Basics:
- Straining: Use a double strainer to remove ice chips and achieve a smooth texture, especially for stirred drinks.
- Building vs. Shaking/Stirring: Some drinks are built directly in the glass, like a Bloody Mary. Here, dilution comes from the liquid ingredients themselves.
- Experimentation is Key: Practice with different techniques and ice types to find the perfect balance for your taste.
Remember: Dilution is an art, not a science. With practice and these tips, you’ll be a dilution master, crafting cocktails with the perfect balance of texture and flavour to impress your guests!
Layered Libations: Mastering the Art of Visually Stunning Cocktails
There’s something undeniably captivating about a well-layered cocktail. The vibrant colours separated into distinct bands create a mesmerizing effect, taking your drink from ordinary to extraordinary. This guide unveils the secrets of layering, empowering you to craft visually stunning and delicious cocktails at home.
The Science Behind the Art:
The key to successful layering lies in understanding density. Different liquids have varying densities – heavier ones sink, while lighter ones float. For beautiful layering, you need to build your drink from densest ingredients at the bottom to lightest on top.
Building Your Layered Masterpiece:
The Tools:
- Bar Spoon: Essential for gently pouring liquids down the back of the spoon to prevent disruption of the layers.
- Layered Shot Glass: Ideal for showcasing your creation with its straight sides.
- Chill Everything: Use chilled ingredients and glassware to maintain separation and prevent layers from diffusing.
- Start Heavy, End Light: Here’s a typical layering order:
- Syrups/Liqueurs (Densest): Grenadine, Blue Curaçao, Orgeat syrups provide a vibrant base.
- Juices: Pineapple, orange, cranberry juices add a pop of colour in the middle layer.
- Spirits (Lightest): Vodka, rum, tequila – their lighter density allows them to float on top.
- The Gentle Pour: Hold the bar spoon against the inside of the glass, angled slightly towards the centre. Slowly pour your ingredient down the back of the spoon, allowing it to gently settle beneath the previous layer.
Pro Tips:
- Play with Colours: Experiment with contrasting colours for maximum visual impact. Red, orange, yellow, and green work particularly well.
- Garnish for Perfection: A strategically placed garnish can elevate your layered masterpiece. Try a citrus twist or a single berry perched on the rim.
- Practice Makes Perfect: Layering takes finesse. Don’t be discouraged if your first attempt isn’t perfect. Keep practicing, and you’ll be a layering pro in no time!
Mastering the Art of Safe and Efficient Bartending: A Guide to Using Bar Equipment Like a Pro
Behind the counter of a bustling bar, efficiency and safety are paramount. Knowing how to use your equipment properly not only speeds up service but also minimizes the risk of accidents and injuries. Here’s a crash course on safe and efficient use of bar equipment:
Safety First: Sharp Objects Respect: Bar knives and jiggers have sharp edges. Always handle them with care, pointing them downwards when not in use. Wash them carefully and store them safely away from the work area.
Glassware: Broken glass is a serious hazard. Inspect glasses for cracks or chips before use and discard any damaged ones immediately. Use a proper glass rack to store and transport glasses to minimize the risk of breakage.
Ice Management: Slippery ice can lead to falls. Use a rubber mat behind your bar and wear non-slip shoes. Always clean up spills promptly and be cautious when handling ice buckets.
Fire Safety: If your bar uses flaming techniques, ensure you have a fire extinguisher readily available and understand how to use it properly. Never leave a flaming drink unattended.
Efficiency is Key:
Mise en Place: The French term for “having everything in its place.” This means organizing your bar with frequently used tools and ingredients within easy reach. Group similar items together and keep backups stocked to avoid delays.
Multitasking: While maintaining safety, learn to perform multiple tasks simultaneously. For example, while a drink shakes, you can prepare garnishes for the next order.
Clean as You Go: Rinsing your jigger and bar spoon between uses prevents flavour contamination and saves time later. Wipe down spills immediately to maintain a clean and organized workspace.
Master Your Techniques: Practice efficient pouring techniques like free-pouring (once mastered) and using a bar spoon for controlled measurements. The faster you can measure and pour, the quicker you can serve drinks.
Pro Tips:
Invest in Quality Equipment: Sturdy, well-made tools will last longer and make your job easier. A good shaker seals tightly and a comfortable bar spoon aids in efficient stirring.
Label Everything: Clearly labelled bottles and syrups save time searching for ingredients and avoid confusion during rush hour.
Use the Right Tool for the Job: Don’t muddle a mint sprig with a bar spoon – use a muddler! Using the appropriate tool ensures efficiency and prevents damage to your equipment.
Remember: Safety and efficiency go hand-in-hand behind the bar. By prioritizing safety measures and implementing efficient practices, you’ll create a smooth workflow, minimize accidents, and impress your patrons with your bartending skills!
Beyond the Cocktail: Building Rapport with Guests for an Unforgettable Experience
A skilled bartender isn’t just about crafting delicious drinks; they’re also the host of their own mini-stage, creating a memorable experience for each guest. Here’s the secret ingredient: building rapport!
Making a Warm Connection:
- Smile and Make Eye Contact: A genuine smile and warm eye contact instantly put guests at ease and invite conversation.
- Greet Them by Name (if possible): Remembering someone’s name shows you care and personalizes their experience.
- Active Listening: Give guests your full attention when they speak. Nod, ask clarifying questions, and avoid interrupting.
Conversation Starters:
- “What can I get you started with tonight?” This opens the door for a conversation about their drink preferences.
- “Celebrating anything special?” A lighthearted way to spark conversation and learn about their occasion.
- “Have you tried our…?” Recommend a signature drink or a new spirit they might enjoy, sparking their interest.
Tailoring the Experience:
- Read Body Language: Are they looking for a chat or a quiet drink? Adapt your approach accordingly.
- Offer Recommendations: Suggest drinks based on their preferences, creating a sense of guidance and personalized service.
- Be Attentive, Not Overbearing: Refill water glasses, notice empty drinks, and be available for requests without hovering.
Creating a Welcoming Atmosphere:
- Learn Regulars’ Names: Makes them feel valued and encourages them to return.
- Remember Preferences: Recall their favorite drink or spirit, adding a personal touch.
- Engage in Friendly Conversation: Share a joke, discuss local events, or recommend upcoming shows – within reason, of course!
The Art of the Farewell:
- Thank Them for Coming: Express your appreciation for their business.
- Wish Them Well: A “Have a great night!” or “Safe travels!” leaves a positive closing note.
Remember: Building rapport is about genuine interaction. Be yourself, be attentive, and create a space where guests feel welcome and comfortable.
Bartending Skills for Beginners: Your Ultimate Guide to Becoming a Pro Behind the Bar
Mastering the art of bartending goes beyond memorizing recipes and pouring drinks. It’s about efficiency, building rapport, and creating a memorable experience for your guests. This guide equips you with the essential skills to become a pro behind the bar.
Gearing Up for Speed:
- Time Management Ninja: Busy nights demand organization. Learn to prioritize tasks, estimate preparation times, and anticipate customer needs.
- Muscle Memory Masters: Consistent practice is key! Rehearse common drink recipes to develop muscle memory for smooth and efficient preparation.
- Mise en Place Magic: A well-organized workspace is a bartender’s best friend. Arrange tools, ingredients, and garnishes within easy reach to avoid delays.
The Art of Multitasking:
- Order Maestro: Learn to actively listen and take orders while simultaneously crafting drinks. Anticipate additional requests and be prepared to multitask seamlessly.
Continual Learning and Development:
- Trend Tracker: Stay ahead of the curve by researching new cocktail trends and techniques. Explore emerging spirits and flavour profiles to impress your guests.
- Building Your Repertoire: Expand your cocktail knowledge. Experiment with new recipes, master classic cocktails, and develop your own signature drinks.
- Networking Powerhouse: Connect with other bartenders, attend industry events, and share knowledge. Networking opens doors to new opportunities and keeps you sharp.
- Sharpening Your Skills: Consider certifications or advanced training programs to elevate your craft and gain valuable industry insights.
Beyond the Drinks: Mastering Customer Interaction
- Tricky Situations? No Problem!: Learn to de-escalate tense situations with courtesy and a calm demeanor. If necessary, involve a manager to ensure everyone’s safety.
- The Perfect Recommendation: Becoming a cocktail consigliere is key. Ask questions to understand your customer’s preferences, then recommend a drink that suits their taste.
- Professionalism Under Pressure: Maintain a professional attitude even during rush hour. Be courteous, friendly, and efficient, leaving a positive impression on your guests.
Bonus Tips:
- Practice Makes Perfect: Sharpen your skills at home. Invite friends over, experiment with recipes, and time yourself to improve efficiency.
- Watch the Pros: Observe experienced bartenders in action. Watch their movements, how they handle orders, and how they interact with customers.
- Passion is the Key Ingredient: Love what you do, and it will show! Enthusiasm is contagious, creating a positive atmosphere for everyone.
Conclusion: Your Bartending Journey Begins
With the right tools, techniques, and a passion for mixology, you’re well on your way to becoming a skilled bartender with this great guide for Bartending Skills For Beginners. Remember, practice makes perfect, so keep experimenting, learning, and most importantly, having fun.
Whether you’re mixing drinks for friends at home or aiming to become a professional bartender, the skills you’ve learned here will serve you well. Cheers to your bartending journey, and may your cocktails always be perfectly crafted and enjoyed by all!
If you enjoyed this guide, don’t forget to share it with fellow aspiring bartenders and stay tuned for more tips, recipes, and insights from the world of mixology. Happy bartending!
Read More:
Bartending Skills For Beginners
Mixology Techniques At Home
Creative Cocktail Garnish Ideas
Sustainable Bartending Practices
Seasonal Cocktail Recipes
Alcohol-free Mixology
Customer Service Tips For Bartenders
History Of Classic Cocktails
Disclaimer: This post contains affiliate links. If you purchase through these links, I may earn a small commission at no additional cost to you.